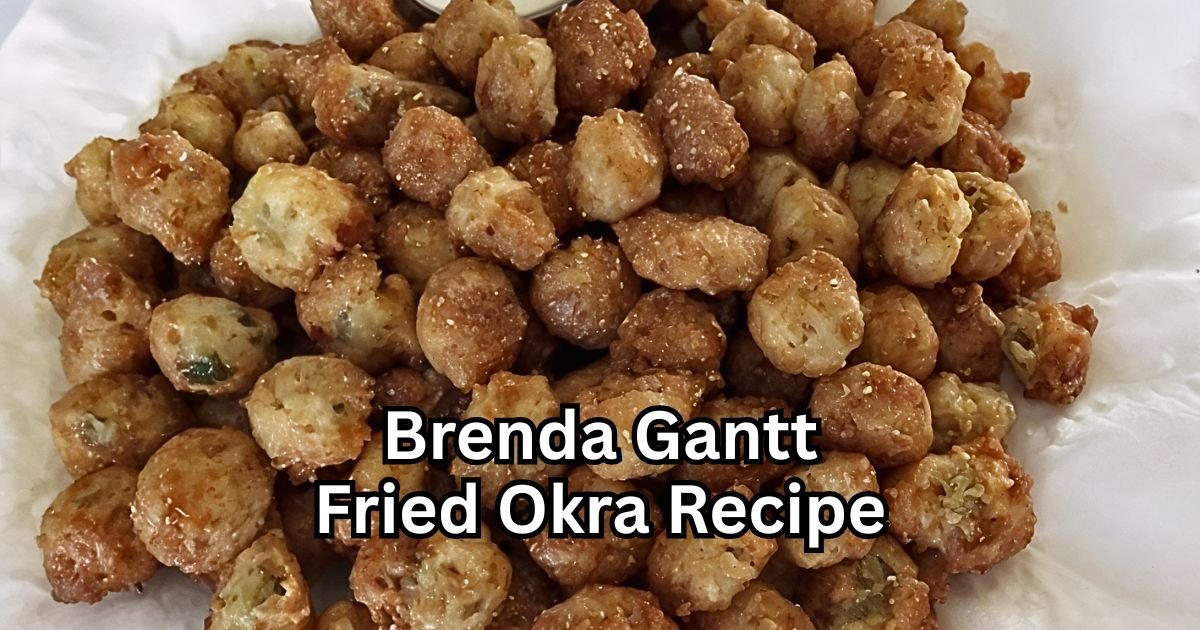
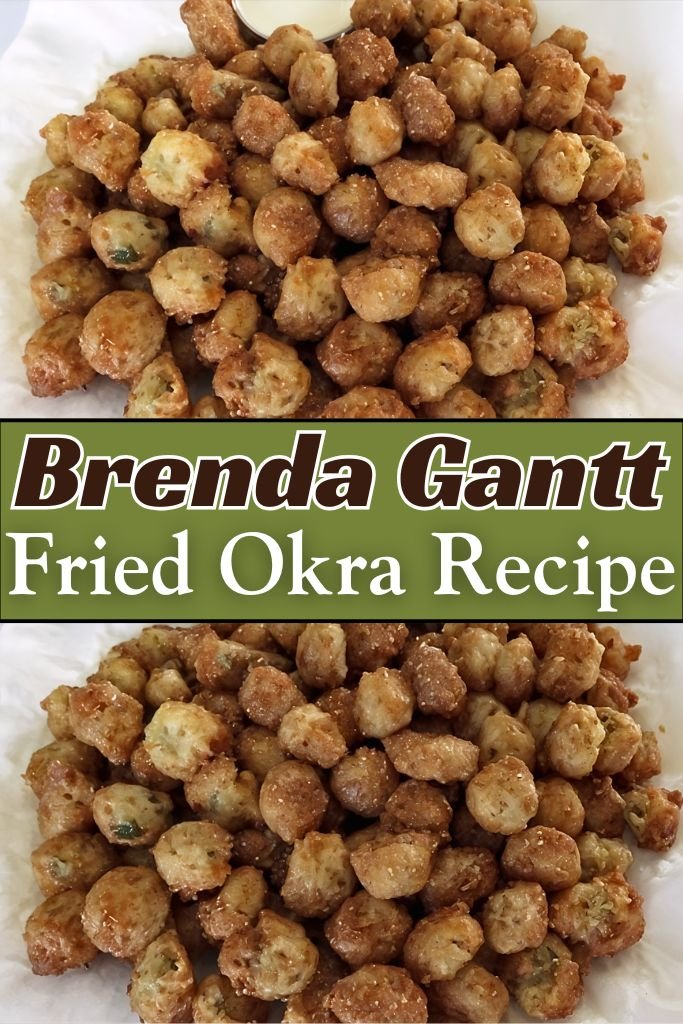
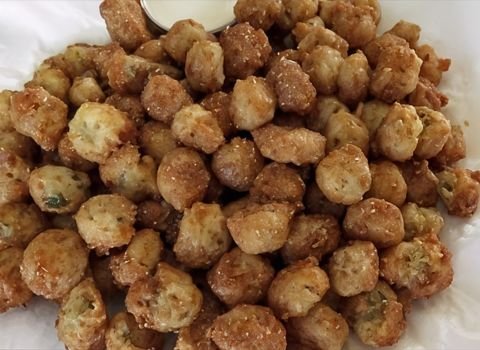
Brenda Gantt Fried Okra Recipe
Brenda Gantt Fried Okra Recipe always reminds me how simple food can bring comfort to a busy day. Many people think okra is too soft, and some say it feels strange to eat.
I once had a college friend who made a funny face the moment okra came up in conversation. That reaction made me smile, because I knew they had never tasted it the way Brenda cooks it.
When the okra is fried to a golden crisp, it becomes a crunchy, satisfying snack that keeps you coming back for more.
In my kitchen, this recipe feels easy and calm to prepare. The okra cooks up light and crisp, and each bite has a gentle flavor that pairs beautifully with many meals.
This copycat Brenda Gantt Fried Okra is perfect for anyone trying fried okra for the first time or looking to enjoy it in a fresh, flavorful way.
How to Select Okra
Picking the right okra makes a big difference in your final dish. Look for pods that are 2 to 4 inches long. These smaller pods cook up tender and soft inside.
Check the color too. Bright green okra means it’s fresh. Dull or faded pods have been sitting too long.
Give each pod a gentle squeeze. Fresh okra feels firm and crisp, not soft or bendy. Stay away from pods with brown spots, blemishes, or any damage.
These signs mean the okra is old or has been handled roughly. Good okra will give you the best results in your Fried Okra Recipe.
Ingredients for Brenda Gantt Fried Okra
- Fresh okra (1 pound): Use young, green pods. They should not feel hard. Larger, tougher pods can be stringy and less tender. If fresh okra isn’t available, frozen okra works too—keep it frozen until ready to fry.
- Buttermilk (1–2 tablespoons): Helps cornmeal stick and adds a slight tang. Regular milk with 1 teaspoon vinegar or lemon juice can be used instead.
- Cornmeal (½ cup): Gives okra a crunchy coating. You can substitute with fine cornmeal or a mix of cornmeal and all-purpose flour for a lighter crust.
- Salt (½ teaspoon): Enhances flavor. Sea salt or kosher salt can be used as alternatives.
- Black pepper (¼ teaspoon): Adds mild spice. Freshly ground is best, but pre-ground works too. Optional: add paprika or cayenne for extra heat.
- Cooking oil (for frying): Lard makes the best fried okra. Vegetable oil works great too. Peanut oil and canola oil are both good choices. You need enough oil (about 2-3 inches deep in your pan) to cover the okra pieces when they cook.
Equipment You’ll Need
- Sharp knife – For slicing okra pods
- Cutting board – Keeps your counter clean
- Large mixing bowl – To mix okra with buttermilk and cornmeal
- Deep pot or skillet – For frying, needs high sides
- Slotted spoon or spider strainer – Lifts okra from hot oil
- Paper towels – For draining excess grease
- Serving platter – To hold your fried okra
- Small bowl – For salt and pepper
How to Make Brenda Gantt Fried Okra at Home
Step 1 | Get the Okra Ready
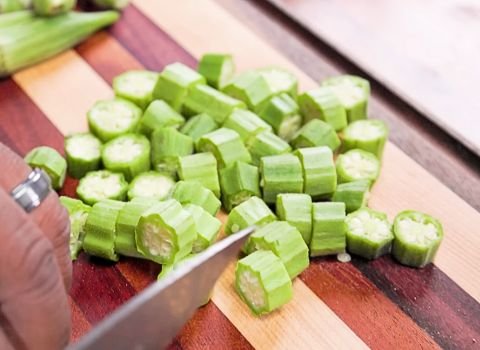
Wash the okra lightly under cool water and place it on a cutting board. Trim only the top tip, keeping the rest of the pod whole. Slice the okra into small round pieces.
Check each pod as you work. If any feel tough or hard, set them aside because they will not cook well.
Step 2 | Coat the Okra
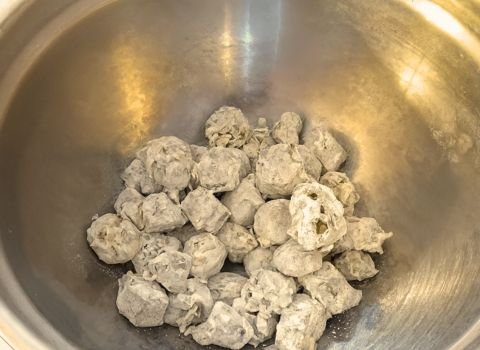
Place the sliced okra into a mixing bowl. Add a small splash of buttermilk and stir until each piece is lightly coated. The okra should look damp, not soaked.
Sprinkle cornmeal mix over the okra and stir again. Add more cornmeal mix as needed until all pieces look dry and covered.
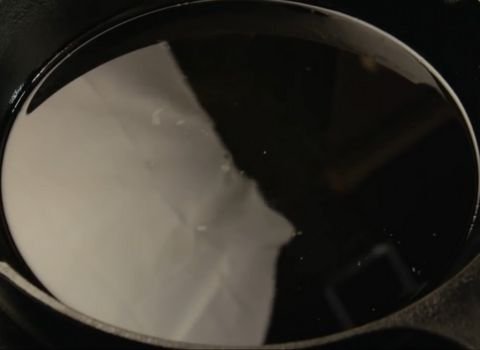
Step 3 | Heat the Oil
Heat lard or cooking oil in a heavy skillet or deep pot. Test the temperature by dropping in one piece of okra. If it sizzles right away, the oil is ready for frying.
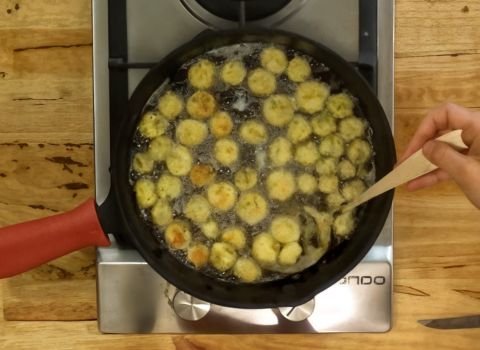
Step 4 | Fry the Okra
Lower the coated okra into the hot oil with a slotted spoon. Avoid stirring too much. Let the okra fry until it turns golden and crisp.
Reduce the heat slightly if the oil gets too hot, so the okra cooks evenly without burning.
Step 5 | Drain and Serve
When the okra is crispy and brown, remove it with a slotted spoon and place it on a paper towel–lined plate. Let the excess grease drain. Fried okra tastes best when served right away.
Tips For The Perfect Fried Okra
Keep the Oil Clean: Scoop out leftover cornmeal bits after each batch. These burn easily and make oil taste bitter. Clean oil ensures every batch stays fresh and tasty.
Don’t Crowd the Pan: Frying too much okra at once drops the oil temperature. Cold oil gives soggy okra, so cook in small batches for crispiness.
Season Right Away: Sprinkle salt and pepper immediately after frying. The coating is slightly oily, helping the seasonings stick. Waiting reduces flavor adhesion.
Use a Thermometer: Heat oil to about 350°F for perfect frying. A consistent temperature cooks okra evenly without burning, giving a reliable crispy texture every time.
Try Different Coatings: Mix flour with cornmeal for a lighter crust, or add garlic, onion, or Cajun spices to customize flavor. Experiment to make it uniquely yours.
Make Ahead Tips
Sliced okra can be prepared a few hours early and kept in the refrigerator. Keep it dry to help the coating stick. The cornmeal mixture can also be measured ahead of time and stored in a small container.
When ready to cook, coat the okra and fry as usual. This helps reduce prep time when cooking for a busy day.
Different Cooking Methods for Fried Okra
1. Pan-roasted: For a lighter version, you can pan-roast the coated okra. Use a wide, non-stick skillet with just a few tablespoons of oil over medium heat. Cook the okra in a single layer, turning often, until it is browned and crispy on all sides. This method uses less oil but still gives a great texture.
2. Oven-Baked Option: Baking is a great hands-off method. Spread the coated okra in a single layer on a baking sheet lined with parchment paper. Spray the okra lightly with cooking spray. Bake at 425°F (220°C) for 15-20 minutes, flipping halfway through, until it is crispy and cooked.
3. Air Fryer Method: An air fryer can make very crispy okra with minimal oil. Place the coated okra in the air fryer basket in a single layer. Spray with a little oil. Cook at 375°F (190°C) for about 10-12 minutes, shaking the basket halfway through the cooking time.
What To Serve With Fried Okra
It goes perfectly with classic Southern favorites like pulled pork sandwiches, creamy coleslaw, and baked beans.
I also love to have it with a simple hamburger or a juicy grilled chicken breast. For a real comfort food dinner, serve it with a bowl of warm green soup.
Storing and Reheating Instructions
Leftover fried okra can be stored in an airtight container in the refrigerator for up to two days.
For reheating, place it in a hot skillet or oven to help restore crispness. Microwaving softens the coating, so dry heat works best.
This dish can also be frozen after frying; spread the pieces on a tray before freezing to keep them separated. Reheat later in the oven for a crisp finish.
Brenda Gantt Fried Okra Recipe FAQs
1. Why does okra sometimes turn soft during frying?
Soft okra often comes from extra moisture on the surface or low oil temperature. When wet pieces enter warm oil, the coating steams instead of crisping.
Drying the pods before slicing and heating the oil properly keeps the texture sharp and crunchy. Proper spacing also helps the coating fry evenly.
2. My okra burns before it gets crisp – help!
Your oil is probably too hot. Lower the heat a little and test with one piece first. Aim for steady bubbles around the okra, not wild smoking.
3. How long does fried okra stay crisp?
Fried okra tastes best within minutes of cooking. As it cools, the coating softens slightly. Keeping the pieces spread out on a rack instead of stacked helps maintain crispness longer. Reheating in a hot oven restores much of the original crunch.
4. Is it necessary to soak okra in buttermilk?
Soaking is not necessary, but the buttermilk does an important job. It helps the cornmeal coating stick to the slippery okra pods.
The acidity in the buttermilk also helps to reduce the natural slime that okra can release. For the best results, a quick toss in buttermilk is recommended.
5. My coating keeps falling off in the oil. Help!
Press the cornmeal gently onto each piece and let it sit one minute before frying. That short rest helps everything stick tight.
Brenda Gantt Fried Okra Recipe

Try the classic Brenda Gantt Fried Okra Recipe for perfectly crisp okra made fast with simple ingredients and easy cooking steps.
Ingredients
- 1 pound fresh okra, sliced into rounds
- 1–2 tablespoons buttermilk (just enough to lightly coat)
- ½ cup cornmeal (fine or regular)
- ½ teaspoon salt
- ¼ teaspoon black pepper
- Cooking oil or lard, enough for 2–3 inches of frying depth
Instructions
- Wash the okra lightly under cool water and place it on a cutting board. Trim only the top tip, keeping the rest of the pod whole. Slice the okra into small round pieces. Check each pod as you work. If any feel tough or hard, set them aside because they will not cook well.
- Place the sliced okra into a mixing bowl. Add a small splash of buttermilk and stir until each piece is lightly coated. The okra should look damp, not soaked. Sprinkle cornmeal mix over the okra and stir again. Add more cornmeal mix as needed until all pieces look dry and covered.
- Heat lard or cooking oil in a heavy skillet or deep pot. Test the temperature by dropping in one piece of okra. If it sizzles right away, the oil is ready for frying.
- Lower the coated okra into the hot oil with a slotted spoon. Avoid stirring too much. Let the okra fry until it turns golden and crisp. Reduce the heat slightly if the oil gets too hot, so the okra cooks evenly without burning.
- When the okra is crispy and brown, remove it with a slotted spoon and place it on a paper towel–lined plate. Let the excess grease drain. Fried okra tastes best when served right away.
Nutrition Information:
Serving Size: 1Amount Per Serving: Calories: 235Total Fat: 11gSaturated Fat: 2gCholesterol: 2mgSodium: 310mgCarbohydrates: 29gFiber: 4gSugar: 3gProtein: 4g
This Brenda Gantt Fried Okra Recipe transforms simple okra into crispy, golden bites that taste amazing. The easy steps and basic ingredients make it easy to recreate this Southern classic at home.
Try adjusting the seasonings or cooking methods to match your personal taste and share how your own version turns out.